Archives for posts with tag: Food

granola1

If you happen to consistently read this blog and stuck with me during my hiatus, you have probably noticed that I am very fond of breakfast.

It is truly in my genes.  We Phillipses are breakfast people.

Since having a baby, breakfast is even more important to me.  Of course it is my time to fuel-up before heading to a physically demanding job (or until my next breakfast – see previous post), but it is my one and only moment during the day that I get to be completely alone.  It is my time to breathe, read a little, and be at peace before all the unknowns of the coming day begin realizing.  It is definitely worth waking up a little early for.

While on maternity leave I started making my own granola.  I have always loved granola, but the dietitian in me cringes at the store-bought kind which is far too high in sugar with serving sizes that could only satisfy a bird (and we Phillipses are not birds).  So my goal was to make granola that wouldn’t send me into a sugar-coma and could keep me full and energized until my next meal.  The result:  I can’t stop eating granola!

In fact, if I don’t eat this for breakfast, I find myself eating it for lunch…or dinner…or snack.

The biggest task in making this granola is buying the ingredients (and you have to go grocery shopping anyway, so why not buys enough to make several batches; you will be sorry if you don’t when your first one disappears).  Once everything is in place, it comes together in minutes and you get the pleasure of your kitchen smelling like toasted nuts and coconut.

Please, try not to eat it all right out of the oven, your breakfasts’ will thank you.

granola2

Go-To Granola

Makes about 6 cups

Note:  This granola keeps well in an airtight container for about 2 weeks.  I usually make a batch a week.  Serve with cold milk or greek yogurt and seasonal fruit.  For the nuts and seeds, I typically us a mix of cashews, whole raw almonds, sliced almonds, pepitas, and walnuts; use whatever nuts you prefer.  The amounts of nuts and seeds I use in each recipe depends on what I have on hand, but I love nuts so I tend to err on the 4 cup side of things.

3 cups old-fashioned oats

3-4 cups mixed nuts and seeds

3 tablespoons brown sugar

1 tablespoon ground cinnamon

1/4 cup canola oil

2 tablespoons maple syrup

1/2 cup unsweetened coconut flakes (not shredded coconut)

1/4 cup dried cherries or cranberries (optional)

Preheat oven to 375° F.  Combine all ingredients except the coconut and dried fruit (if using) in a large bowl until well combined and oats and nuts are evenly coated in oil and maple syrup.  Spread mixture evenly over a baking sheet and bake for 10 minutes, stirring once halfway through.  Remove from oven and sprinkle coconut and dried fruit over the top of the granola.  Bake for 2-3 minutes more, until coconut becomes golden brown (watch it carefully, as coconut burns quickly).  Cool completely and store in an airtight container up to two weeks.

Want more breakfast ideas?  Sure you do:

Saddlebag pancakes – if you can’t decide between sweet or savory

Six Week Muffins – to feed an army (or just yourself for a really long time)

Lemon Blueberry Breakfast Cornbread – because cornbread in a cast iron skillet rocks!

Raspberry Swirl Cinnamon Rolls – best cinnamon rolls ever (no joke!)

Apple and Squash Compote – because veggies are a must, even at breakfast

Goat Cheese Stuffed Squash Blossom and Prosciutto Fritatta – for those of you dreaming of bountiful summer farmer’s markets

honey cake 2

It is likely impossible that my sweet tooth could ever be lost, but it has definitely been tamed.  After working in a bakery for some time, testing very sweet pastries over-and-over, I no longer rich pastries (read: creme brûlée, eclairs, cupcakes) or fancy layer cakes dressed in buttercream.

What will never get old is a treat that I can enjoy when my pang for second breakfast hits and goes well with coffee.

Oh yes…second breakfast.

honey cake 3

I knew I was in the right place once I realized that, like me, the guys I work with at the bakery pretty much follow the feeding schedule of hobbits.  Just swap the tea and pints with coffee and…yup…pretty much hobbits.

Second breakfast and elevenses are for real and very serious.  To avoid early-, mid-, and late-morning grumblings (and to stay on the guys’ good sides), inevitably we must all take a break for coffee and a not-so-sweet baked good.  Be it cornbread, croissants, muffins,  or some form of coffee cake, we all feel much better after we have taken a moment to re-energize and re-caffeinate (and I am no longer afraid to ask one of them to open that pesky bucket of honey).

honey cake 5

Speaking of honey…  One of my favorite cookbooks from 2012 is Vintage Cakes by Julie Richardson.  Full of beautiful recipes and photographs, this book really cover the gamut from decadent special occasion cakes to whip-it-together-during-naptime treats.

And, I absolutely cannot get enough of the honey cake recipe.  It fits all my requirements for cake: not too sweet, super moist, naturally beautiful (no fussy decoration required), it is perfect at 9am (second breakfast) or 9pm (because if I were a hobbit I definitely wouldn’t stop at supper), it is easy to make using ingredients you likely already have on hand, and it can sit happily on your counter for several days.

Honey Cake

Makes 1 9-inch Cake

Adapted slightly from Vintage Cakes by Julie Richardson

Cake:

Heaping 1/2 cup sliced almonds

2 1/4 cups all-purpose flour

2 teaspoons baking powder

1 teaspoon fine sea salt

1 cup (2 sticks) unsalted butter, at room temperature

3/4 cup sugar

1/3 cup honey

2 teaspoons vanilla extract

2 eggs, room temperature

1 egg yolk, room temperature

3/4 cup buttermilk, room temperature

Glaze:

1/2 cup honey

1/4 cup firmly packed brown sugar

1/4 cup unsalted butter

Preheat oven to 350°F.  Spread almonds evenly on a baking sheet and toast until fragrant, about 10 minutes.  Set aside and keep oven on.

Grease a 9 by 3-inch springform pan and line bottom with parchment paper.  In a bowl, mix flour, baking powder, and salt.

In the bowl of a stand mixer fitted with paddle attachment, combine the butter, sugar, honey and vanilla on low speed until blended; increase the speed to high and beat until very light and fluffy 5-7 minutes.  Stop mixer frequently and scrape the paddle and sides of bowl with a rubber spatula.  Beat in eggs and egg yolk one at a time until well incorporated.  With mixer on low, add the flour mixture in three parts, alternating with the buttermilk in two parts, beginning and ending with the flour.   After each addition, mix until just barely blended and stop and scrape the bowl.  Stop them mixer before the last of the flour has been incorporated and complete the blending with a rubber spatula to ensure you do not overbeat the batter.

Spread the batter evenly into prepared pan.  Rap the pan firmly on the counter to release any air bubbles.  Place the pan in the center of the oven and bake for 45 minutes.  The cake will turn a deep golden color and be firm on the top, and a wooden skewer inserted in the middle will have moist crumbs attached.  The cake may crack on the top, this is okay because it will be covered by almonds and will allow more of the glaze to be absorbed into the cake.

While the cake is baking, make the glaze in a small saucepan by stirring the honey, sugar, and butter over medium heat until combined.  Bring the mixture just barely to a simmer.  Turn off heat, but leave saucepan on the burner to keep glaze warm.

Remove the cake from the oven and poke holes all over the top of the cake with a wooden skewer or fork.  Pour half of the glaze over the cake, evenly sprinkle the cake with the almonds, and then pour the rest of the glaze over the almonds.

Place back in the center of the oven and bake for 5 more minutes.

Cool cake on a wire rack for about an hour.  Remove the sides of the pan and transfer cake to a serving plate.  Serve warm or room temperature.

Cake will stay fresh up to five days, stored well wrapped at room temperature.

1

The holidays are a whirl-wind for everyone, but working in a bakery makes them even crazier.  I am always amazed how quickly October through December fly by, it is like boarding a roller coaster that continuously picks up speed and you can do nothing more but ride it out until the momentum abruptly stops after New Year’s Eve.  This was my third holiday season to work as a pastry cook and I am always simultaneously relieved and a little depressed after the season is over.  I am glad to catch my breath at work, but it is always a bummer not to be able to enjoy the holidays like everyone else does.  When you are in school, you gauge your year around semesters, finals, and breaks, my rhythm is now set by chocolate covered strawberries, pumpkin pie, bûche de Noël and the holidays that accompany them.

When it is all said and done though, the sugar/retail-crazed customers, long hours, irritated coworkers, paper cuts from handling too many pie boxes, and my managers’ high-expectations result in satisfaction of a job well done.

Luckily, we are closed on Christmas and I was able to enjoy time with my family and celebrate my baby’s first Christmas.  I cooked these scrumptious short ribs (which is becoming quite a Christmas tradition) and this tres leches cake (but with cranberry compote instead of peaches) and of course my dad’s frozen cranberry salad joined the party.

32

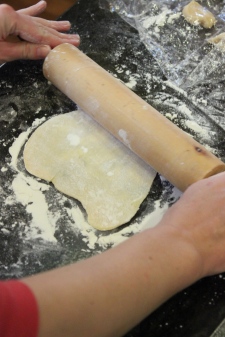
We also indulged in a Swiss family recipe called kuechli, fried pastry dusted in sugar.  When my grandma was growing up in Missouri, she remembers her Aunts and Uncles making kuechli on their farm during the holiday season.  They gathered in the kitchen to knead and stretch rounds of dough over their knees into irregular circles before adding them to the frying oil where they would become golden and blistered until they finally dusted the finished pastry with sugar and enjoyed the fruits of their labor.

4IMG_4220

My family made kuechli a few times when I was younger.  I mostly remember many people jammed into a not-so-big kitchen, getting flour and sugar all over the place, and reveling in the season and each other.  It was a lot of fun with a particularly tasty outcome.  It has been years since we made kuechli together, but while planning our Christmas day activities for this year, my sister suggested we make kuechli again.

IMG_4187

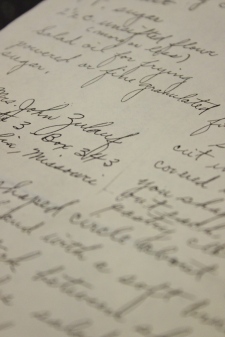
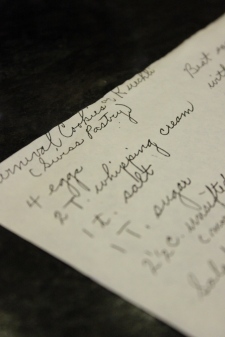
As with anything involving food and cooking, I was all in and my mom consulted my great-grandmother’s handwritten recipe to prepare.  And, as usual, I was curious to know more about kuechli than only my childhood memories held.  I found that if you just type “kuechli”  into a search engine, nothing comes up related to these fried Swiss treats.  After searching around and looking at the family recipe a bit more, I learned that these can also be called Fasnachtsküchlein (carnival cookies) or Chnüblätz (knee cookies), as they are traditionally stretched over the knee instead of rolled out with a rolling pin, and are often served at festivals or carnivals in Switzerland (their version of funnel cake I suppose).

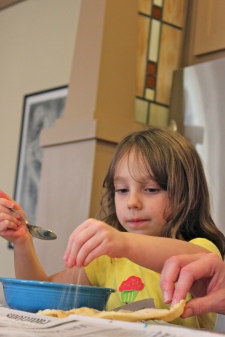
As it should be, making kuechli was a group effort – my sister rolled the dough into thin rounds, I manned the frying, my niece made sure the hot pastries were liberally coated in sugar, and well…everyone else ate.  It was perfect.

IMG_4198IMG_4202

A belated Happy Holidays to all!  I hope you celebrated traditions old and new with your family and that 2013 brings much joy and peace.

Kuechli

Makes 24 7-inch pastries

Recipe from my Zulauf family and a page written by my great-grandma Zulauf

Note:  I wrote the recipe exactly as it was written my my great-grandmother.  I love how old recipes are written with such assumption and informality so I wanted to keep it as is.

4 eggs

2 tablespoons whipping cream

1 teaspoon salt

1 tablespoons sugar

2 1/2 cups all-purpose flour

Vegetable oil for frying

Granulated sugar for dusting

Beat eggs, cream, salt, and sugar with 2 1/2 cups flour until well mixed – the dough is quite soft.  Turn out onto a well floured board.  Knead lightly for five minutes until dough feels smooth on the surface.  Cover and let rest for 20 minutes.

Shape dough into a log and cut into 24 equal pieces.  Keep covered with clear plastic while you shape each cookie.  Roll out each piece on a well floured pastry cloth or board to make a randomly shaped circle about 7 inches in diameter.  Lift from cloths and with a soft brush whisk off excess flour.  Stack between sheets of clear plastic.

Heat about 3/4 inches oil to 325° to 350° in deep sauce pan  of 8 or 9 inches in diameter [Note: I used a 10-inch cast iron skillet which worked fine]; maintain temperature over moderate heat.  Push cookies – one at a time – down into fat and cook until a light golden color, turning once with tongs.  Drain on paper towels and dust with granulated sugar.

Serve at once or store in an airtight container at room temperature unto to 2 weeks, or freeze.  To refresh, spread on a baking sheet and warm 2 or 3 minutes in a 350° oven.